

myTimetable is the system used for student class timetabling.
Accessing myTimetable
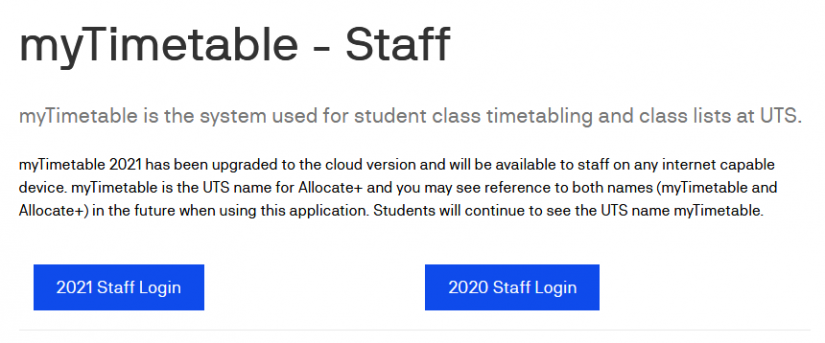
1. Staff can access the system via mytimetable.uts.edu.au/staff - you may wish to bookmark this.
2. Timetabling for each academic year is kept in a separate instance of myTimetable. Select the login button for the academic year required
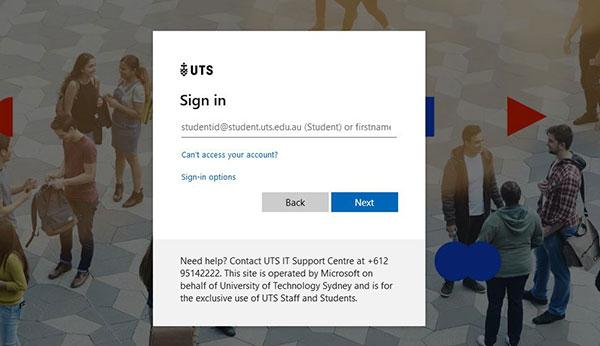
3. The link will take you to the administrative login page. If you’re already authenticated to Office 365, you will go straight in without needing to re-authenticate.
Otherwise, you will need to authenticate using your staff email address and password.
Note: If you get an error "Authentication Successful but no such user registered", this indicates that you do not have an account in myTimetable. Please request access using the Service catalogue in ServiceConnect.
Finding your subject and class requirements
1. Once logged in, you should see a list of subjects for your faculty on the left of the screen.
The codes can be broken down to: Subject number_Session_Campus_Availability Number_Attendance Mode
For example:
25556_AUT_U_1_S denotes 25556, AUTUMN, City (Ultimo), Availability 1, Standard (Internal) Attendance.
25556_AUT_U_2_B is the 2nd availability for the session, taught in Block attendance mode.
Note: The code “U” (Ultimo) is used for the City Campus. View Help with Timetable Terms for more subject (teaching session, campus, attendance mode) and class codes.
2. Type your subject number in the search bar at the top of the list of subjects. The list will be filtered progressively as you type a subject number into it.
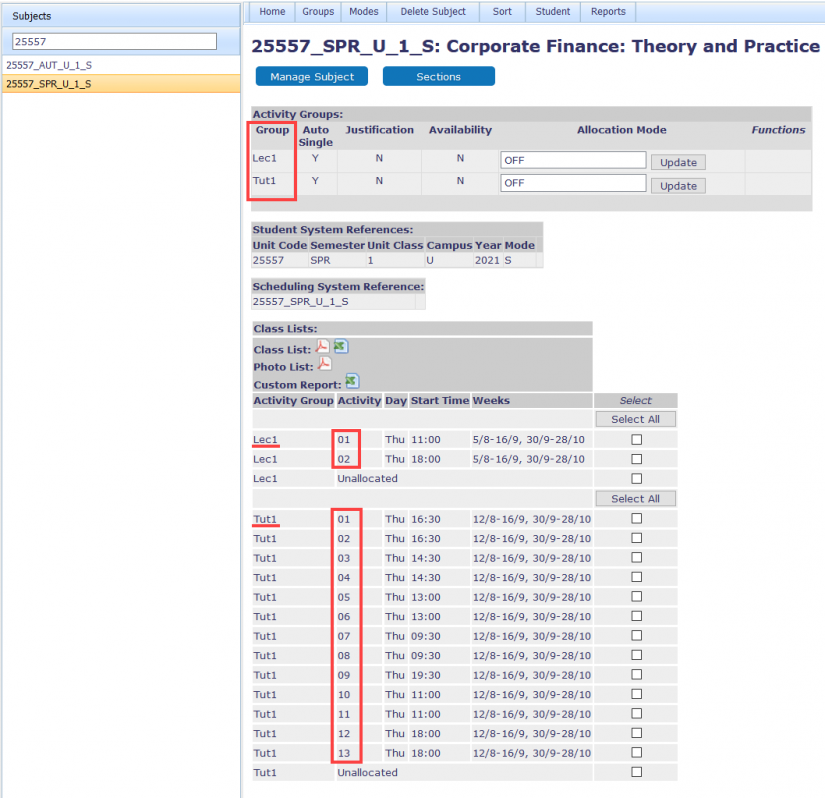
3. Select your subject in the list to show the class requirements
For the following example:
- The subject requires the students to attend one lecture and one tutorial a week.
- The lecture is offered once per week.
- They have a choice of 13 classes for the tutorial.
Generating class lists
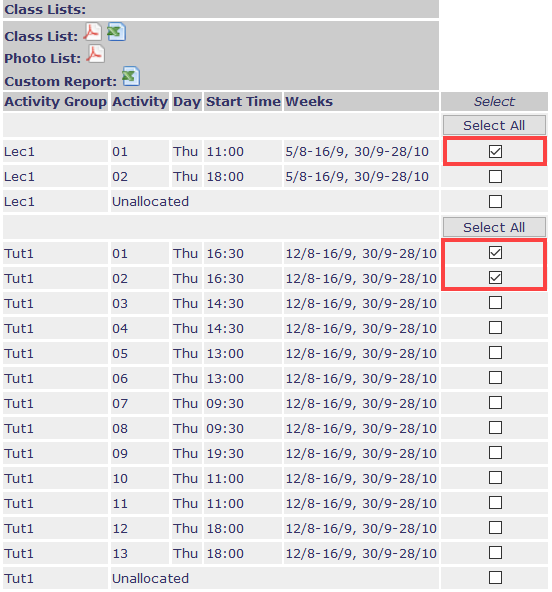
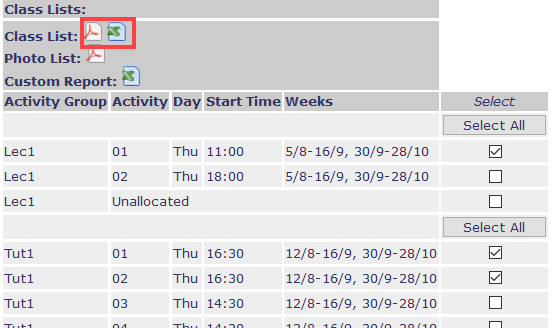
1. Use the tick-boxes to select all the classes (“activities”) you need class lists for. Select the “Unallocated” tick-box if you also want a list of those students who have enrolled in the subject but haven’t chosen a class yet. Alternatively, you can use the “Select All” buttons.
2. Choose a format for the class list by clicking on the Excel or PDF icon.
Note: Photo lists are not available at this time.
3. The report will show the Student Number, Preferred Name* and Last Name by default. At this stage, you can select additional fields to add, e.g. email address. Then click “Get Report”.
*Note that where students do not have a Preferred Name listed, the Preferred Name field will default to a student's First Name.
Your browser will then download the report (it may open it or prompt you to save it, depending on your browser settings).

Class list
The class list will show the students in the class and the teaching dates. The class details are shown at the top of the list. Please note that locations are generally not displayed until 2 weeks prior to the start of session and staff details for individual classes are not kept in myTimetable at UTS.
The PDF class list will start each new class on a new page, including any unallocated students listed on a page at the end.

An Excel class list shows the classes in separate worksheets (tabs) in the file.
