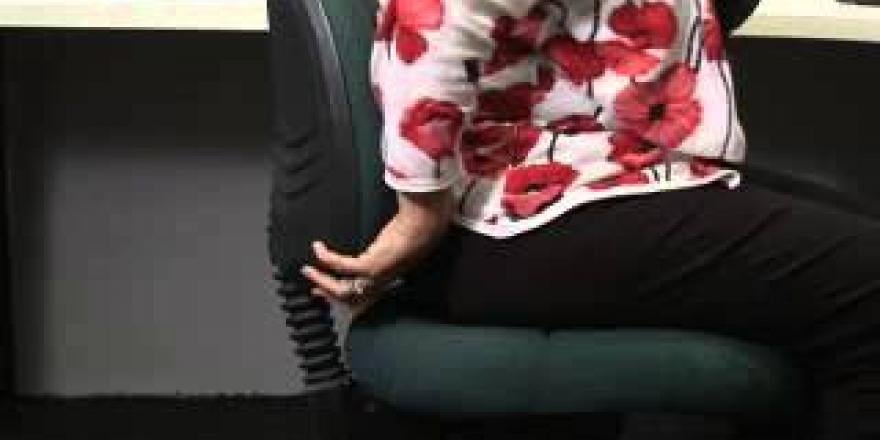

It is important to adjust your workstation so that:

  • The chair height allows feet to be flat on the floor or on a footrest.
  • The backrest supports your lumbar curve.
  • There is adequate clearance between the desk and thighs.
  • Thighs are parallel to the floor.
  • Shoulders are relaxed and elbows are at about a 90 degree angle when hands are on the home row of keys (a-l).
  • Wrists are straight when resting on the home row of keys.
  • The screen is set at a comfortable viewing distance (at approximately arms length).
  • The top of the screen is set at about eye level.

Laptops and notebooks

For laptop and notebook computers, the setup is basically the same configuration as for a desktop computer, but the important thing to remember is that laptops are made for convenience, not for comfort.

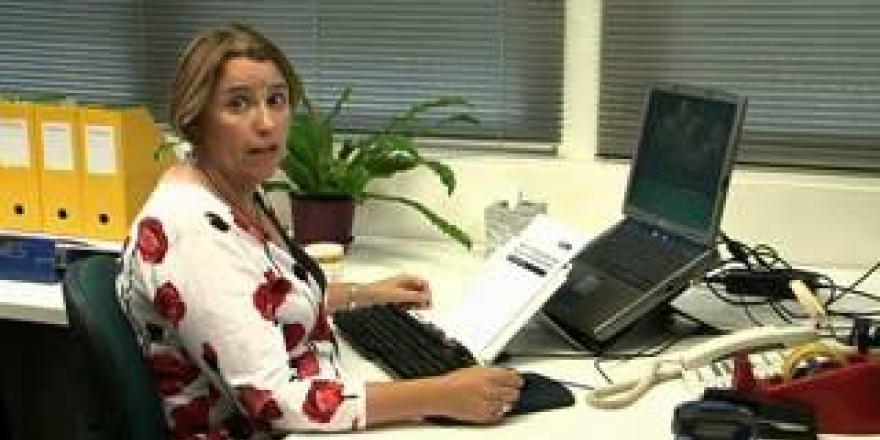
So you need to add auxiliary items to the laptop in order to be safe and comfortable. Attach an independent keyboard and mouse, and have your laptop up on a riser so that the top of the screen can be at eye level. Alternatively, attach a monitor to your laptop and have your laptop off to the side, and then adjust your monitor position as you would for a desktop computer.

Resources

Introduction to Computer Comfort

BBB1sb8bju0

Transcript

Hello, I'm Tina from the Safety and Wellbeing team here at UTS. We've designed these videos to assist you with setting up your workstation correctly. What this will do is reduce the fatigue on your body and also more evenly distribute the workload. Now, I want you to remember that it doesn't matter how beautifully you set up your workstation, or how fabulous your posture is – if you don't get up and move regularly, then you will have problems, because the human body wasn't designed to sit for hours on end.

Adjusting your chair

GAOr5Q8ZM74

Transcript

With a correct workstation, we're going to start by adjusting our chair. The first thing you need to do is sit right back in the seat and ensure that your thigh is supported and you have between two and four fingers behind your knee. This will ensure that you have reasonable circulation to your legs. The next thing is to make sure that the maximum padding on the back support is in the small of your back, behind your navel. So we just incrementally increase it until it sits in that spot. This back lever here will adjust the angle of the back support. We want to bring it in close, to offer optimal support while we're seated at the workstation. Now, we're ready to move into the workstation with our chair.

Adjusting your desk

oI42w5QK9jo

Transcript

To set up your workstation correctly, start by adjusting your chair. Sit right back in the seat, ensuring your thighs are supported and that you have a gap of two to four fingers behind your knee. This will help maintain good circulation to your legs.

Next, make sure the maximum padding on the back support is positioned in the small of your back, just behind your navel. Incrementally adjust it until it sits in that spot. Use the back lever to adjust the angle of the back support, bringing it in close to provide optimal support while seated at the workstation.

Now, bring your chair into the desk. The desk surface should be at elbow height so you can keep your wrists flat while typing. Sit flush to the desk edge and square to your task to maintain spinal alignment.

With the keyboard, tuck your elbows in close to your sides and turn your hands over so your fingers fall on the middle row of keys. This avoids over-reaching or retracting your arms.

Place your mouse right next to the end of the keyboard so you don't have to move your arm away from your body. Try to alternate mouse use between your left and right hands from time to time.

When sitting at the desk edge, your screen should be about an arm's length away for comfortable viewing. The top of the screen should be at eye level to maintain correct neck alignment and prevent your chin from protruding or retracting.

If you use reference documents, keep them on a document holder between the keyboard and the screen to avoid turning to the side and to reduce neck muscle strain and flexion.

If you use the telephone regularly, keep it within easy arm's reach.

If your feet aren't flat on the floor when seated at your work surface, consider using a foot stool. If you wear multi-focal glasses, the top of the screen should be lower than eye level. Tilt and lower the screen so you maintain correct neck alignment when reading through the base of your glasses.

[End of video. Produced by Video Production Unit / Events, Exhibitions and Projects (C) 2009. Safety and Wellbeing, University of Technology Sydney.]

Adjusting your laptop or notebook computer
sWp8V7Y4OBA

Transcript

With correct workstation setup, we're going to start by adjusting our chair. The first thing you need to do is sit right back in the seat and ensure that your thigh is supported and you have between two and four fingers behind your knee. This will ensure that you have reasonable circulation to your legs. The next thing is to make sure that the maximum padding on the back support is in the small of your back, behind your navel. So we just incrementally increase it until it sits in that spot. This back lever here will adjust the angle of the back support. We want to bring it in close to offer optimal support while we're seated at the workstation. Now we're ready to move into the workstation with our chair.

[Visuals show a person demonstrating adjusting a laptop workstation. The setup is similar to a PC, but laptops are made for convenience, not comfort.] So you need to add auxiliary items to the laptop in order to be safe and comfortable. Attach an independent keyboard and mouse, and have your laptop up on a riser so that the top of the screen is at eye level. Alternatively, you can attach a monitor to your laptop and have your laptop off to the side, adjusting your monitor as you would with a PC.

[Visuals: UTS and Safety and Wellbeing branding. Produced by Video Production Unit / Events, Exhibitions and Projects. (C) 2009 Safety and Wellbeing University of Technology, Sydney.]